Basic Sampling For Native Instruments Kontakt Part 1 Kontakt by Native Instruments has got to be the sampling world standard for professional musicians and media composers alike. When you think about it, every film you ever saw, or any game you have ever played has had a soundtrack that features…

Basic Sampling For Native Instruments Kontakt Part 2
In part 1 we looked at what sampling represents and how to record our instruments for sampling. In this post we will go deeper into the process of sampling by showing you how to properly edit your samples and how to load them appropriately into Kontakt for key-mapping. Let’s get started.
EDITING SAMPLES:
Okay, so you’ve recorded everything you want to and now you need to cut and edit the samples for importing to Kontakt. Editing samples is basically the same as editing any other sound out there, but I can give you a few good tips on what to watch out for.
When you have finished your recording session you will probably be looking at a track similar to this:

Everything is nicely recorded based on dynamic range from softest to the loudest and nothing is clipping, everything is nice and smooth.
Now you want to start cutting and editing the samples to prepare them for exporting and labelling.
The first thing you should do is to zoom in on the tracks so you can see the start and end-tail of each sample. I mean to zoom in very, very close like this:

You place your cursor at the very start of the sample’s waveform and make a cut. Then you move to the very end of the tail, and make a cut there, followed by a small fade out if the sample ends abruptly. You want to make your percussion samples usable by taking care of the initial hits and smooth ends.

Repeat that process for every sample that you have recorded and after a while you will have all of your samples nicely cut and edited. Now you need to bounce or export those samples and label them properly.
There are many ways to label your samples and there is no right or wrong way to do it. It all depends on you.
What I like to do is to label a percussion sample, for example like this:
perc_stick01_p
perc – the name of the instrument (in my case, some percussive instrument)
stick01 – the type of material I hit the percussion with
p – pianissimo dynamic range
This is just an example but it all really depends on how complex you want your sampled instrument to be. There are also round robins but we’ll talk about them later.
MAPPING THE SAMPLES:
Once all of the naming and exporting sample clips is over, the next step is to map everything together inside Kontakt’s key-mapping window.
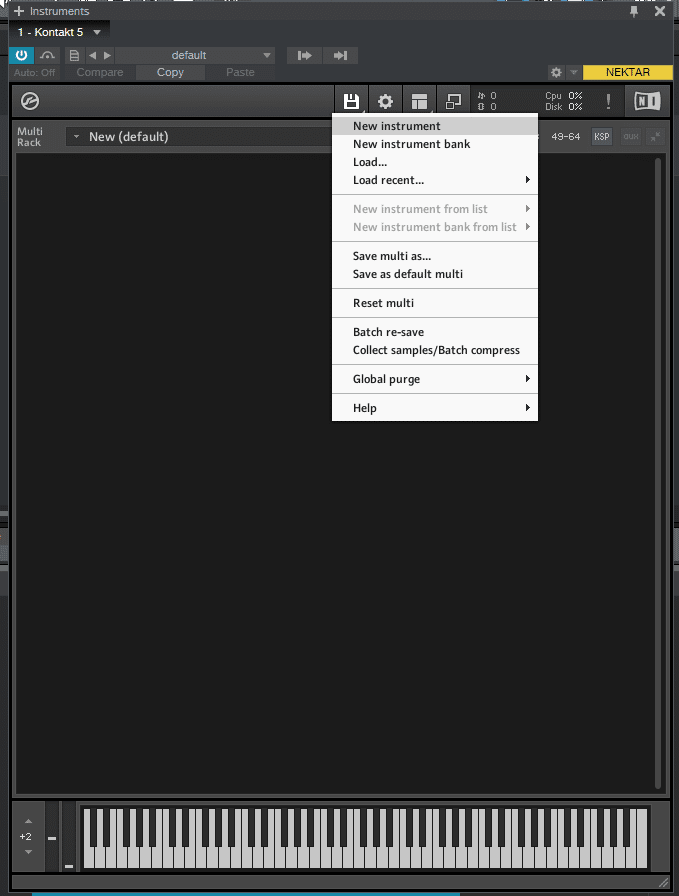
When we open our Kontakt instance, we need to create the new instrument which will host our samples. You click on the small disc icon and select New Instrument. After that it’s time to edit the instrument and populate it with samples because the newly created instrument has absolutely no sounds at all. You click on the small wrench in the left corner of the instrument and you will get a plethora of options to work with. What we are interested in at the moment is the Mapping Editor.
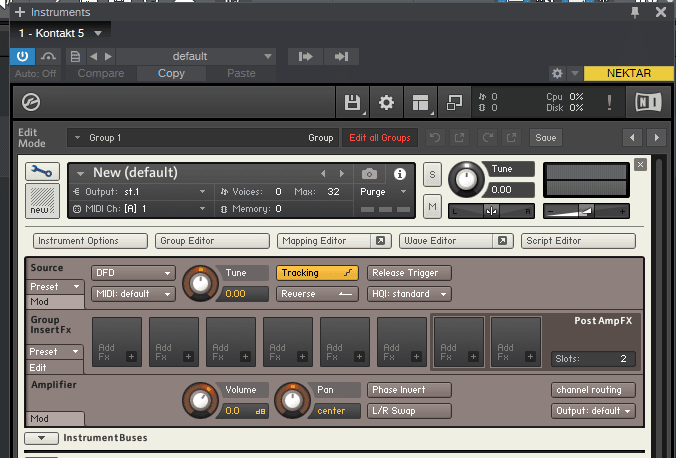
When you click on the mapping editor tab you will see some kind of a piano roll where you are importing the samples. The best way to do it is to drag and drop the actual file of the sample to the corresponding key inside the key-mapper.
Bearing in mind that this is a percussion instrument, we don’t need to pay attention to which key are we mapping the sample. If it was a melodic instrument like a piano then we need to map the right note of the instrument to the corresponding key on the key-mapper.
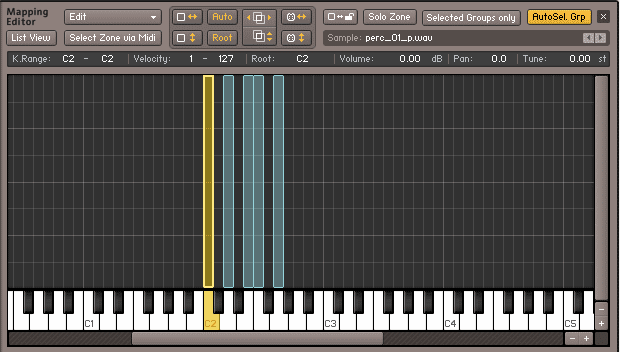
You can simply drag and drop the samples to the corresponding key. You can zoom in on the piano roll by clicking on the small + and – buttons in right corner of the editor. Once you load one of the samples it may stretch itself over a few piano keys so the best way to limit its range is to drag its edge and make it narrower.
When arranging the samples inside the mapping editor there is no right or wrong way when it comes to percussion instruments. You can place the samples on one key and stack the dynamic range one on top of the other, or you can place each next dynamic range sample to the next key that follows. Junkie XL likes mapping his percussion like this. It enables you to play the percussion samples across the keyboard without the need to play the keys harder or softer.
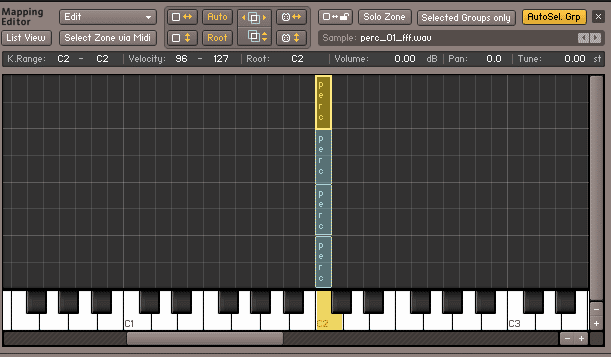
Once you have stacked and positioned all of your samples the way you wanted you are ready to save your instrument for later use.
SAVING AND USING THE INSTRUMENT:
When you close the mapping editor you can then add some built-in effects that come with Kontakt like reverb for example. You can also change the name of the instrument in the name tab where it says “New (Default)”.
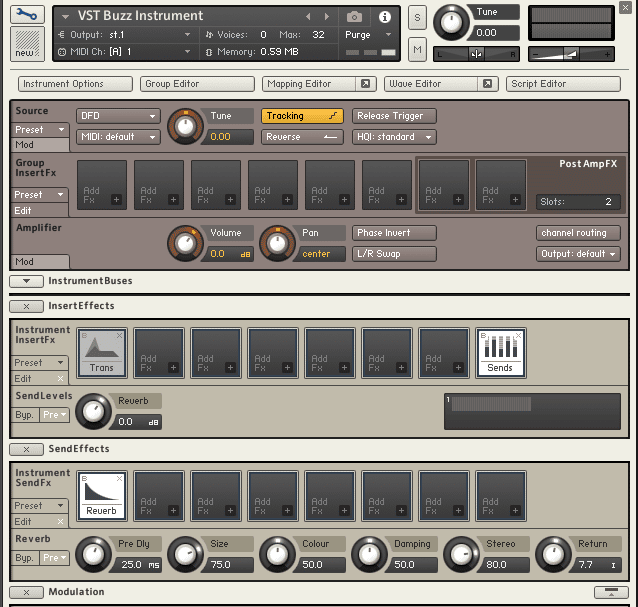
To close the instrument options tab you just click on the wrench icon in the top left corner of the instrument. In order to save it you need to click on the small disk icon in Kontakt’s options above your instrument and select “Save As”, and then your instrument will automatically appear in the menu.
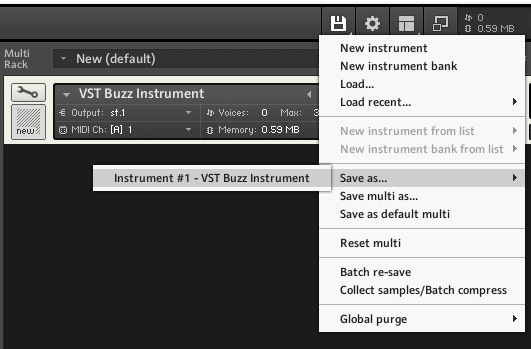
Click on that and you will see a window with options for saving the instrument. There are three types of save modes to choose from.
The best one to choose is Monolith because it saves both your instrument patch AND your samples to a single file and you can also choose the Compress Samples option in order to make the instrument smaller in size because we all know how big sample libraries can get.

And there you have it. The simple basics of sampling for beginners. Join us in part 3 where we will look at how to create your custom interface without the use of scripting.


