Cascading Delays To Create Moving Pulses
Our topic for this post is how to create moving pulses, the backbone of every tension or action cue in today’s film, game and trailer music.
Sometimes they’re not prominent enough for us to hear, but we can feel them if they’re done properly. Any sound source can be used to create a pulse, it all depends if you want it to be a low-end pumping pulse or something that clicks in the higher frequency range.
The most common way to do a pulse is to take a bass synth sound, sequence it to play it in 8th or 16th notes, and then modulate it a bit with some filters. We’ll be taking the sound designer’s approach to this by cascading multiple delay units in order to create movement with playing just one note on the downbeat. Something like Edge from U2 does with his guitars through a delay set to dotted 8th notes, but only a bit more cinematic.
THE SOUND SOURCE:
Before we begin, I would like you to know that all of the instruments and plugins I chose here are not mandatory for you to use. You can create the same results using whatever you have at your disposal, I am just giving you the ‘know-how’.
As a sound source, I chose the monophonic synth because my strong opinion is that pulses are designed to be played just one note at a time, not chords, but you can use polyphonic synth as well for more variations. If you’re a synth enthusiast like me, you can also go for a hardware synth as well, why not.
Mojito is a bundled synth that comes with PreSonus Studio One DAW and it’s actually quite good for basses and pulses due to its monophonic nature. It’s minimalistic only when it comes to GUI and design, but the sounds you can get out of it are so much more, plus it works well with processing plugins.
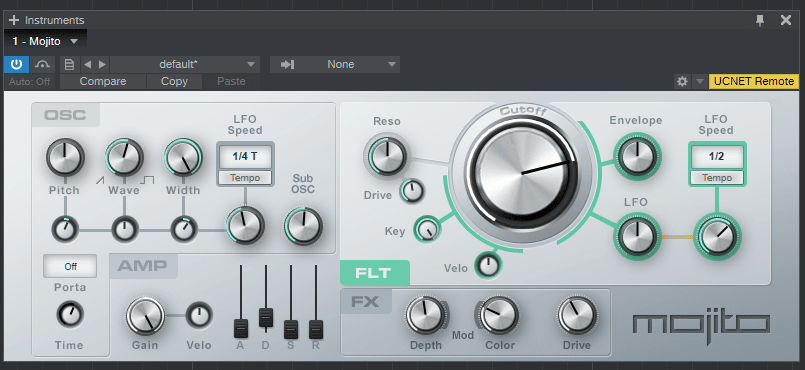
So, we’ve got our oscillator set up, the LFO speed for some modulation of various elements and we’ve set our ADSR to be really short and punchy, and we are modulating our cutoff filter with the mod wheel to create some nice sonic variations. We’ve also added a bit of chorus on it to make it a bit more fuller sounding.
Now that we have a synth sound ready, we can start playing. And we play one note, but then we get something like this:
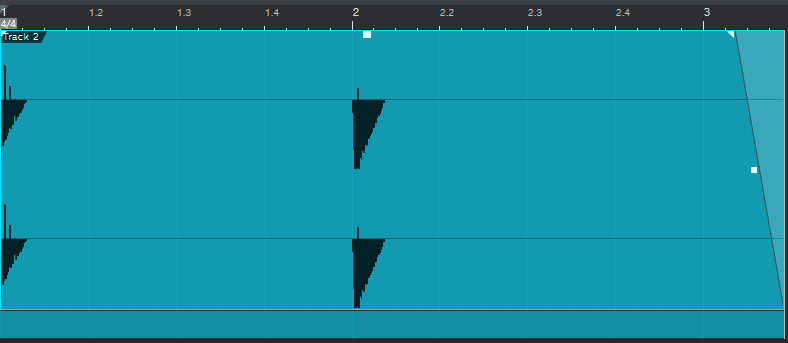
That’s two notes only played at the starting beat of each bar. Not very amusing is it? You feel that something is missing, and you’re right. You need to add delays.
THE DELAY STACK:
The title of this blog post is ‘cascading delays’, so that’s exactly what we’re doing.
We will be stacking them in series, i.e. one after the other so that the second one adds more delays to the first one, the third one into the previous two and so on… We are adding them here as INSERTS on the synth track itself, not as SENDS, and there’s nothing wrong with that. For demonstration purposes here, I am using Echoboy by Soundtoys. So, let’s start with the first one.
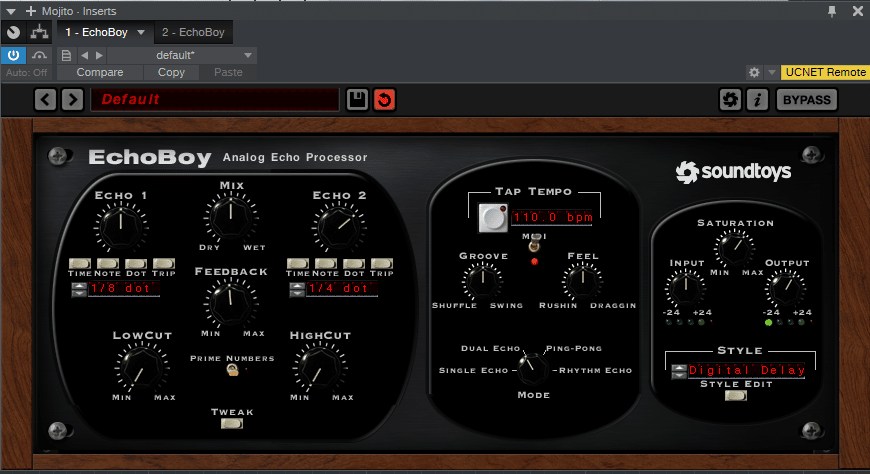
I like changing delay styles for each delay that comes next, so the first one that I chose is the cleanest one of all as a digital delay. Some saturation does make things warmer. The good thing you can do with most software delays today is to sync them to the tempo of the project, so they will always follow the beat. You can do it with milliseconds, but that’s more for ambient washy tracks.
When it comes to tension and action, it’s always better to be in sync. You will see that my track tempo is 110BPM as it says in the middle section of the GUI. You can use whichever tempo your track is in, of course.
I set up this delay as dual echo, so I can get a bit of stereo movement because each echo will be in a different subdivision. I like dotted notes because they give you more groove as opposed to straight ones. So, the first one is set to dotted 8ths and the other one to dotted 4ths. The mix and feedback knobs are your best friend and worst enemy here.
Add too much of them, and you’ll be getting a lot of chaos, too little, you won’t be getting any sort of result, so balancing them depending on your track BPM is very important. Because the delays are added as inserts, the Mix knob is very important for balancing the sound.
Because if you add it full to 100%, you will only hear the delayed signal and not the actual sound that triggers it all. I start at 50% and see where it takes me from there, depending on how fast my track is.
And this is the signal we get after adding the first delay:
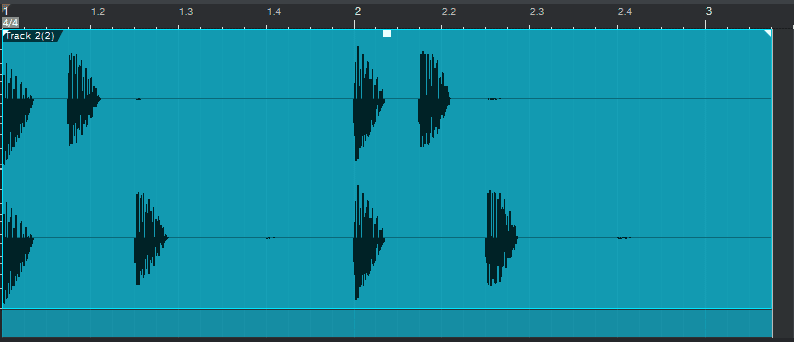
Not too shabby, but we need this pulse to be consistent and to sound continuously. This is where the second delay comes in.
The second one is set up to be rhythm echo playing straight 8th notes because we want to process the previous delay with some straight beating sounds to make the groovy dotted notes snappier.
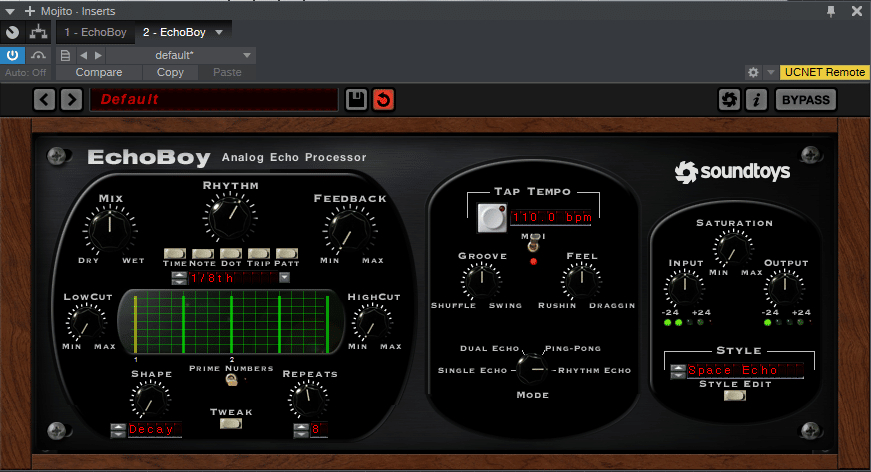
The tempo is synced to 110BPM of the track tempo, just like the previous one, but the sonic style of the delay is set to space echo to make it more ambient. No saturation on this one, because we don’t want to get the echoes distorted when adding this one to the previous one which is saturated.
The mix knob is set to 50% again, and we don’t need any feedback at all, because it will wash out the sound. We just need it to echo once in order to make those previous dual delays more rhythmical.
This is what we’re getting after adding the second delay:
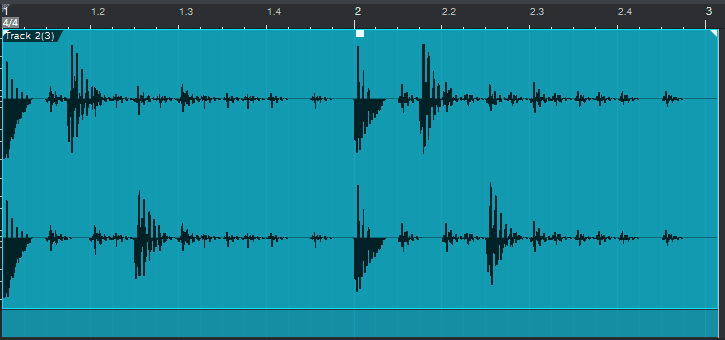
Now things are getting more and more interesting and we have a more consistent signal going on here.
And now we add the third one.
This one was a ping-pong stereo delay simulating an FM radio to make it a bit more interesting with added saturation just for fun.
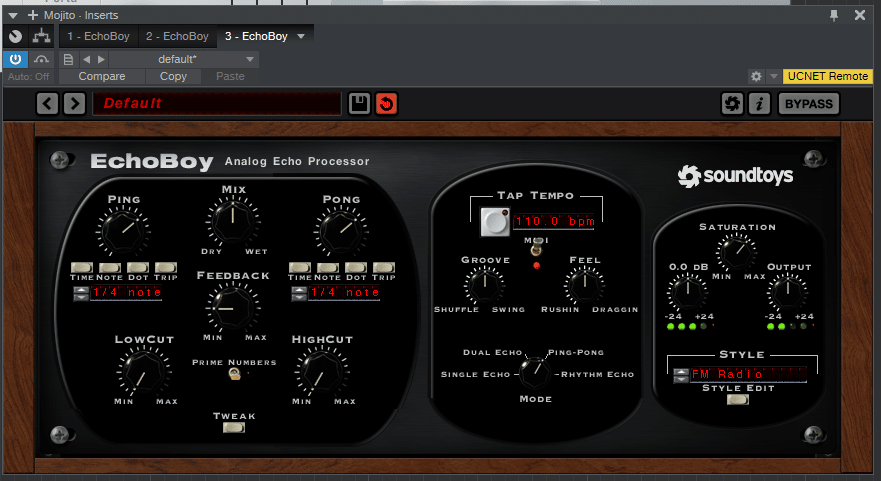
The tap tempo is the same as the previous ones, with the delay subdivisions set to straight quarters with a tiny bit of feedback, and the mix knob again set to 50%. Having said that, this third delay serves for doing a bit of stereo panning to give more movement to the overall sound and make it bounce nicely.
This is what you end up with:

Now, this is a full-blown pulsating sound which can go on forever, so all you need to do is to sit down and play some notes on each starting beat of every bar, and let the delays do the rest.
Practice this and you will be making awesome pulses which will make your action cues more original, and your clients will love you for it!


