Conventional advice recommends to always mix with high quality monitors instead of headphones. But there are times when due to a number of reasons it might be impractical to mix with monitors and you will have to depend on headphones to get you through a project. So, in this post I am going to give you a few tips on how to get the most out of mixing with headphones.
1. OPEN BACK HEADPHONES
In order to make your headphone mixing experience as effective as possible, my first suggestion to you is to mix with open or semi-open headphones instead of closed back headphones. While closed backed headphones are ideal for tracking due to their superior isolation, when it comes to mixing they are less accurate and can lead to ear fatigue. Open back headphones on the other hand tend to be more well balanced across the frequency spectrum and due to their open nature facilitate some natural cross-feed between the ears, which is useful in helping to judge the stereo image and work with spatial effects.
2. MULTIPLE PLAYBACK SYSTEMS
While the subject of this post focuses on improving the quality of your mixes on headphones, if at all possible it is still advisable to check your mixes on a few systems. At the very least this could mean comparing on several pairs of headphones, perhaps open back, closed back and a trusty pair of earbuds. If you do happen to have access to a pair of decent monitors, it is a great idea to check your mixes through them every once in a while. Listening to how your mixes translate on to other systems will help you understand the deficiencies in your own environment and adapt to them. This is particularly true of the bass end of things, which is typically one of the most difficult aspects of a mix to judge when mixing exclusively with headphones.
3. REFERENCE TRACKS
The utility of reference tracks is not exclusive to mixing with headphones, whether you are mixing with a pair of budget headphones in a bedroom or behind the console of a world-class studio, reference tracks are an essential tool during the mix phase. Before you can reap the benefits of reference tracks, you will first need to do a bit of homework. Start by putting together a list of 2-3 songs that are well mixed and with which you are familiar in each of the genres of music you work in and putting the files in a folder. For the best results, make sure all files are in wav format.
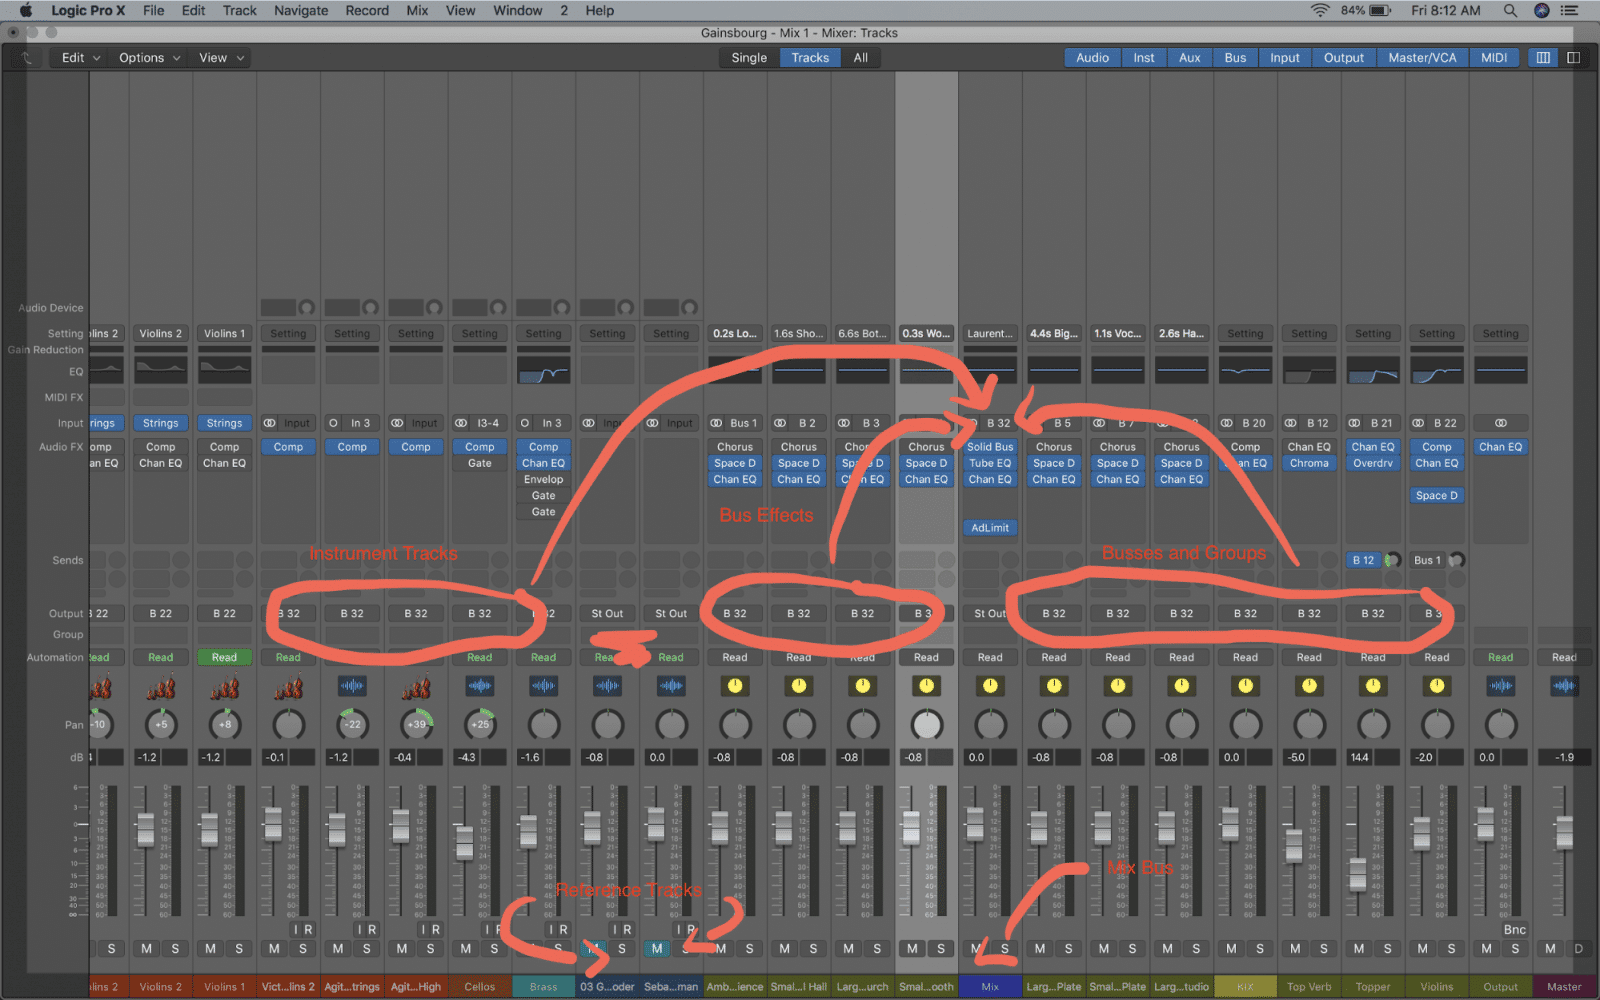
If you have any compression or EQ or other processing on your mix bus you will want to exclude your reference track from being processed through them. You could disable each plugin on the bus and solo your reference track but there is a much simpler and effective method. Create a new bus and load your mix bus processing on it. Next, route the outputs to all your sends and other groups to this bus and remove the processing from your original stereo bus if you previously had any. Now when you hit solo on your reference track you will be listening without any additional processing.
As you switch back and forth between your reference and your mix and listen carefully to differences in frequency balance and stereo imaging. Try to pick up as many differences as you can by ear making adjustments to your track accordingly.
4. FREQUENCY ANALYZERS
A great tool to help you get the most out of your reference mixes is a frequency analyzer. There are several dedicated frequency analyzer plugins out there by third party developers, but many DAWs come with EQs that have built in analyzers. There are two main ways of taking advantage of frequency analysis. The first way is on an individual track basis; in this case you will use the analyzer as a visual aid to determine what the dominant frequencies are from a given source. Combined with focus listening, this can be an effective way of helping you identify frequencies that might be the cause of masking. The second way to use a frequency analyzer is on the stereo bus, which will give you an opportunity to keep track of the average frequency output of your track. This is especially effective when combined with the reference tracks. After analyzing the frequencies of your reference track you may want to take a screenshot for easy reference.
5. MATCH EQ
One very simple yet effective process that can get you that last 5% of the way to a polish mixed is match EQ. In short, a match EQ analyzes the frequencies of two different tracks and allows you to “match” one to the other by automatically generating a custom curve that represents the difference in frequency output between the two tracks. Some programs like Logic and Cubase have EQs with this feature built in, but there are third party plugins available that can do this as well. IMPORTANT NOTE: Match EQ should not be used as a substitute for sound mixing technique, but rather as a fine brush that can be used at the end of the mixing process once you have come as close as you can to your reference track.
Top 10 FREE Mixing & Mastering Plugins 2019 The never-ending quest for the best mixing and mastering plugins is back again, only this time we’re searching through the freebies. We scouted through many polls and forums to look for what the audio engineering community has to say about freeware mixing…
5 Tips For Fatter Low End In Your Production 1. START AT THE SOURCE The first place to start, if you want a fat low end in your production is with the arrangement itself. In a rock track this might mean looking at the bass line to be sure it…
8 Pre-Production Tips For Your Next Session Recording in the studio can be a very stressful experience but with a little homework you can make your next session a lot more enjoyable. In this post I am going to give you some tips that can help you save time and…