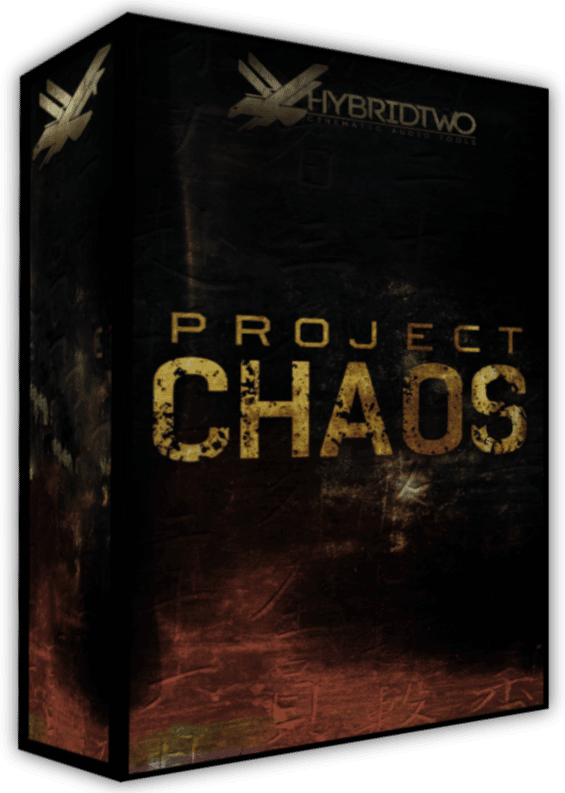
The Definitive User Expandable Hybrid Instrument For Full Kontakt
“Project Chaos” features 2GB+ of all new sample content in multiple categories including:
- AD Breaks, Analog Synth Loops
- Chaos Drum Hits, Chaos Drum Loops
- Distorted Bits, Downers, Drones & Textures,
- Fragment Drones, Fragment Repeaters
- Haze, Impacts, KickForce, Drum Hits
- Percussion Loops, Rhythm Low/Mid/High, Taps
- Risers, Booms, Waveforms, Whooshes
Key Features
- Hybrid Two’s most advanced UI
- Bring in your audio and create your own Project Chaos expansions with the included Bank Manager tool
- Custom Preset System
- Per-Layer Step Sequencers with Per-Step Sub Sequencers
- Sample selection across up to 32 Sample Categories on every layer
- Solo play mode and Menu play mode with Keyswitch Tuning per-layer
- Modulation Matrix with 2 Scripted LFOs and 2 Sequencers
- Created by renowned sound designers Daniel James and Aaron Frensley
- Open Wave Format allows easy drag and drop of all sample content into your DAW
- Note: Requires the Full retail version of Kontakt 5.8.1 or above (NOT compatible with the Free Kontakt Player).
Geared towards Film, TV, Video Game composers and Sound Designers, “Project Chaos” provides everything you need to take those epic tracks to an entirely new level!
68% off “Project Chaos” by Hybrid Two
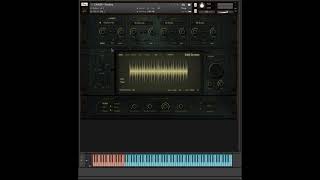
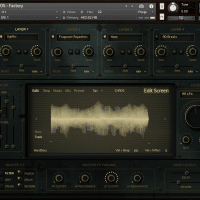
An Intuitive And Powerful Interface For Creating Rhythmic Mayhem
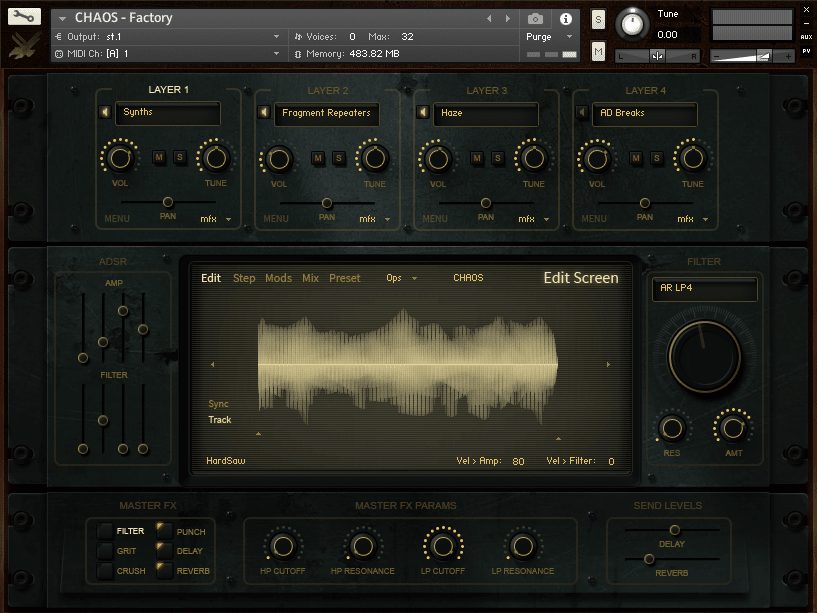
“Project Chaos” features Hybrid Two’s most advanced UI to date while keeping with their philosophy that ease of use is king.
With “Project Chaos”, you have access to 4 layers, each with their own advanced step sequencer, featuring per-step sub sequencers for volume, sample start, tuning and pan.
Add to that their custom scripted modulation matrix featuring 2 LFOs and 2 Sequencers and the rhythmic possibilities are insane – and they’ve never been this easy to achieve.
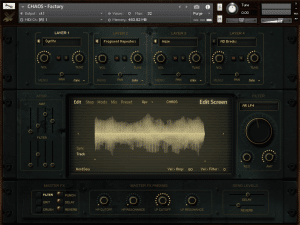
Top Section
- LAYER SELECTORS – The Label at the top of each layer can be clicked to select the layer for editing.
- LAYER ENABLERS – The button with the speaker icon enables the layer. Layers that aren’t enabled will not produce any sound.
- CATEGORY SELECTORS – Each Layer contains up to 32 sound categories. Use this dropdown to select one.
- LAYER MIXER CONTROLS – Each layer has adjustable Volume, Tuning, and Pan, as well as mute and solo buttons.
- MENU MODE ENABLER – Each layer can be in one of two play modes. Solo mode, which maps a single sample across the entire keyboard, and Menu mode, which maps each sample to a single key.
- LAYER OUTPUT SELECTOR – This menu selects the output to which the layer will be routed.
Middle Section
- LAYER ADSR – On the left is the Layer ADSR section. This section allows you to shape Amp and Filter ADSR envelopes on the currently selected layer.
- LAYER FILTER CONTROLS – To the right is the Layer Filter section. This section controls the Filter on the currently selected layer.
Screen
- PAGE TABS – These are used to change screen pages.
- OPERATIONS MENU – This menu contains functions to show/hide the sample pitch adjuster, copy/paste sequencer steps and initialise the patch.
Master FX Selectors/Enablers
- FX SELECTORS – Use these to select the effect for editing.
- FX ENABLERS – These switches turn the FX on/off.
Master FX Parameters
In the middle are the controls for the various FX parameters. These update to reflect the currently selected effect.
Take Complete Control Of Your Sound & Import Your Own Samples
The heart of “Project Chaos” revolves around the five central editing and preset screens. Here you can browse through multiple categories of inspiring sounds, edit and tweak them to your hearts content and even import your own samples for manipulation by the Chaos engine!
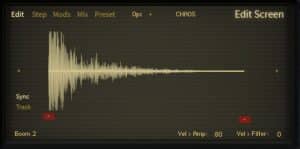
Edit Screen
This screen allows you to browse samples on the selected layer, enable syncing and tracking, adjust velocity settings, adjust the sample start range used by the sub sequencer and adjust sample tuning for your bank.
- PREVIOUS/NEXT SAMPLE ARROWS – Use these to browse through samples while the layer is in default Solo play mode.
- SAMPLE START RANGE – The left handle sets the sample start offset point. The right handle is used to define the range used by the Sub Sequencer’s Start parameter.
- LAYER SYNC – Use this to activate/de-activate tempo sync on the selected layer.
- LAYER KEYTRACKING – Use this to activate/de-activate keytracking on the selected layer.
- LAYER VELOCITY TO AMP – Used to control how much velocity effects the volume of the note.
- LAYER VELOCITY TO FILTER – Used to control how much velocity effects the filter cutoff.
Step Sequencer
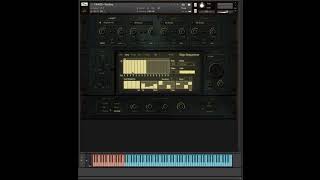
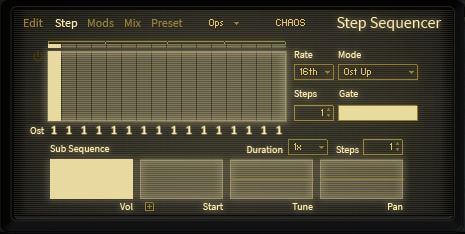
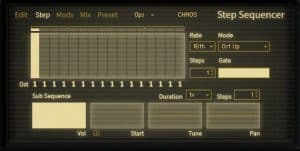
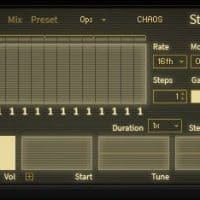
This screen is where you access Project Chaos’ advanced step sequencers. Each layer has its own sequencer, so this screen updates to reflect the currently selected layer.
- STEP SEQUENCER POWER – This button turns on/off the step sequencer.
- STEP SELECT – Use this to select steps without entering data.
- MAIN SEQUENCE – Use this to enter velocity data for the steps.
- OSTINATO SEQUENCE – When you hold down a chord/multiple keys, each key is assigned a number, with 1 being the lowest note and (up to) 8 being the highest note.
- SEQUENCER RATE – Use this to set the rate at which the steps will be cycled through.
- SEQUENCER MODE – Select from either Ost Up, Ost Down or 3 different arpeggiator play modes.
- SEQUENCER STEP COUNT – This adjusts how many steps the sequencer will play through before cycling back to the first.
- SEQUENCER GATE – This adjusts how long each sequencer note will be held.
Sub Sequence Controls
This is where the true power lies in Project Chaos’ Sequencers. Every step in the main sequence has its own Sub Sequence. You will notice that these controls update to reflect the currently selected step in the main sequence.
- SUB SEQUENCE STEPS – This adjusts how many steps the sub sequence will contain. A sub sequence can contain up to 32 steps.
- SUB SEQUENCE DURATION – This value is a multiplier of your main sequencer rate.
- SUB SEQUENCE VOLUME – Sets the volume for each step in the sub sequence.
- SUB SEQUENCE START – Sets the sample start offset for each step in the sub sequence.
- SUB SEQUENCE TUNE – Sets the tuning for each step in the sub sequence. This works in semitones with a +/- 12 semitone range.
- SUB SEQUENCE PAN – Sets the panning for each step in the sub sequence.
- SUB SEQUENCE ZOOM – Use this button to access the Sub Sequence Start Zoom screen. This screen helps you to make more deliberate adjustments to the start offset sub sequence.
Modulators
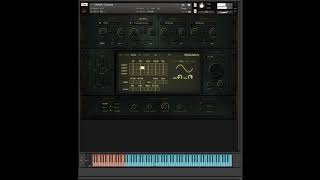
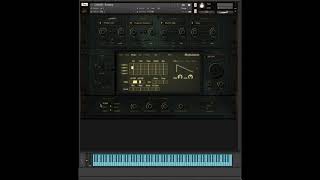
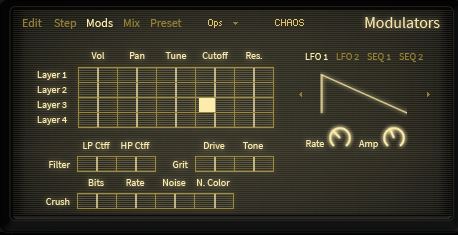
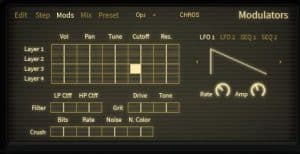
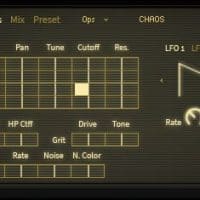
This screen is where you access the scripted modulators. There are four modulators available: two LFO’s and two Sequencers.
- MODULATOR SELECTOR TABS – Use these tabs to select one of the four modulators.
- MODULATION MATRIX – This lets you adjust the amount of influence the currently selected modulator has on the target parameter.
- LFO SHAPE SELECTORS – Change the LFO shape with these arrows.
- LFO OFFSET – The LFO shape display doubles as an LFO offset slider. Drag left or right on the shape to offset it.
- LFO RATE – This sets the rate at which the LFO will complete a full cycle.
- LFO AMP – This adjusts the amplitude of the LFO. A setting of 0 will result in the LFO having no effect.
- MOD SEQUENCE TABLE – Use this to edit the amplitude of each step in the Mod Sequence.
- MOD SEQUENCE RATE – This adjust the rate at which the Mod Sequence will cycle through ALL steps.
- MOD SEQUENCE STEP COUNT – Use this to adjust the number of steps in the Mod Sequence.
- MOD SEQUENCE TO LFO AMP – The mod sequencers can be used to influence the LFO1 and LFO2 Amp parameters.
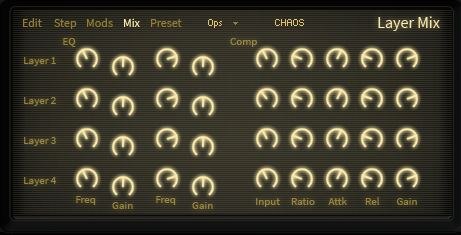
Layer Mix
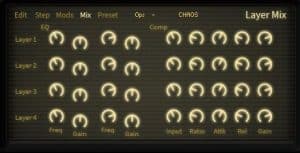
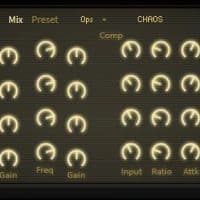
This screen provides access to 2-band EQ and Compression for each layer.
- EQ FREQUENCY – Use these to set the band frequencies for the 2-band EQs.
- EQ GAIN – Use these to set the band gain for the 2-band EQs.
- COMPRESSION INPUT – These adjust both the level of signal going to the compressors and the threshold.
- COMPRESSION RATIO – These determine how much to compress the signal that exceeds the threshold.
- COMPRESSION ATTACK – These tell the compressors how long to take to reach full compression after the signal exceeds the threshold.
- COMPRESSION RELEASE – These tell the compressors how long to take to return to no compression.
- COMPRESSION GAIN – These add gain to the signal coming out of the compressors.
Presets
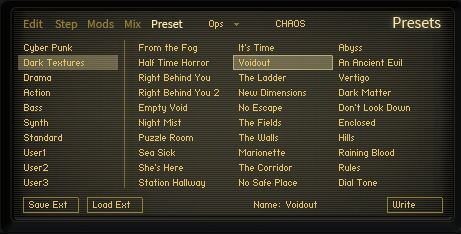
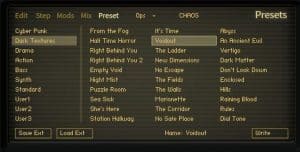
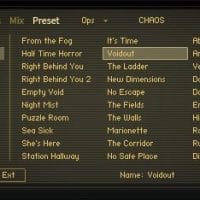
This screen is where you access Project Chaos’ fully custom scripted preset system. All Chaos Banks can hold 300 internal presets and can save and load external presets.
- PRESET CATEGORIES – This is where you select the Preset category. Each category holds 30 presets.
- PRESET GRID – This is where you select and load internal presets. Click once to select a preset, or double click to load it.
- SELECTED PRESET – The highlighted preset is the preset that is currently selected.
- LOADED PRESET – The outlined preset is the preset that was last loaded.
- PRESET NAME – Use this to name your preset before writing it.
- WRITE PRESET – Use this to write your preset to the currently selected preset slot. USE WITH CAUTION. Ensure that you have the the correct preset slot selected before clicking this.
- SAVE EXTERNAL PRESET – This will allow you to save a preset to an external file somewhere on your HDD.
- LOAD EXTERNAL PRESET – This will let you load an external preset.
Project Chaos Is Built On The Idea Of User-Expandability
Using Hybrid Two’s Bank Manager tool, you can get your own samples imported and ready to be used and abused by Project Chaos’ UI easier than it’s ever been in any other Kontakt instrument.
But It Goes Beyond Just Importing Your Samples
With Project Chaos, you can create what Hybrid Two are calling Chaos Banks. These are essentially self-contained instances of Project Chaos, each with their own set of up to 32 sample categories and their own set of 300 presets. For the first time, it’s possible to truly make Hybrid Two’s instrument your own.
68% off “Project Chaos” by Hybrid Two
So What Can I Do With “Project Chaos”?
“Project Chaos” is an incredibly flexible library that has a wide range of uses for the modern Composer/Sound Designer.
With a huge number of inspiring patches and a wide range of easily adjustable effects it is perfect for but not limited to:
- Epic Trailers
- Cinematic Underscore
- Video Games
- Sound Design
This library comes in both Kontakt format patches AND also includes standalone .WAV files which you can drop directly into the DAW of your choice for instant impact!
Note: The Kontakt patches require the Full Retail version of Kontakt 5.8.1 or above (Not compatible with the Free Kontakt Player).
Note: Please be aware that these libraries need to be downloaded using the free Pulse Downloader application, no manual links will be provided.
Normally €219 – get it at 68% off before it’s gone!
- 68% off the normal price (normally €219)!
- Over 2.3 gigabytes of sample content
- Hybrid Two’s most advanced UI
- Bring in your audio and create your own Project Chaos expansions with the included Bank Manager tool
- Custom Preset System
- Per-Layer Step Sequencers with Per-Step Sub Sequencers
- Sample selection across up to 32 Sample Categories on every layer
- Solo play mode and Menu play mode with Keyswitch Tuning per-layer
- Modulation Matrix with 2 Scripted LFOs and 2 Sequencers
- Created by renowned sound designers Daniel James and Aaron Frensley
- Open Wave Format allows easy drag and drop of all sample content into your DAW
- Note: The Kontakt patches require the Full Retail version of Kontakt 5.8.1 or above (Not compatible with the Free Kontakt Player).
- Note: Please be aware that these libraries need to be downloaded using the free Pulse Downloader application, no manual links will be provided.
- Perfect for Epic Trailers, Cinematic Underscore, Video Games, Sound Design and much more!
What People Think About 68% off “Project Chaos” by Hybrid Two
-
"… the included samples are great, and there’s endless sound design potential to be exploited."

Computer Music
Music Industry Blog
-
"Project Chaos offers you a complete, ready-made sound design toolkit with excellent sounds, lots of processing and modulation options and the opportunity to create your very own custom sample sets. You truly can’t go wrong with this!"

Epic Composer
Music Industry Blog
-
"I am confident giving Project Chaos a BIG thumbs up, as the fresh and new styled sound design alone is worth the cost of entry"

Sample Library Review
Music Industry Blog







Jonathan – :
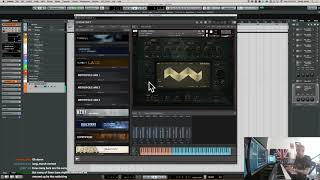
Extremely powerful once you get your head wrapped around the functionality. For sure watch the YouTube tutorials to better understand the instrument. I do wish that user added loops didn’t have to be formatted to 4 bars in length, but I’m guessing there is a reason. really looking forward to using my own sounds with this!
Christopher – :
Great sounds and customization from Daniel James and Team. It’s now a part of my daily rig for making Cinematic scores and instrumentals now. Even input your own samples to make special sounds and FX. Highly recommend!!!
Nathan – :
Very high quality sounds, easy to use, and great for inspiration. The Chaos engine is a little confusing at first but is very powerful once you understand how it works. 10/10
Stan – :
If you’re on the fence with Project Chaos, jump onto the purchase side. It’s more than another “noisemaker”—and it’s exceptional in that regard. Nice presets and great adjustability from there, with some exceptional features for quick and quality tweaks—and very enjoyable to use once you get the hang of the more unusual features and capabilities.
Sheldon – :
This is one of the best sound design tools for cinematics sounds and music in the market. I can even import my own sounds and use the Chaos engine make it even better!
takao – :
I was very lucky to know the sale of VST Buzz at just the right time.
It’s a very hard and cool track to match with an orchestra.
The Chaos engine also looks very interesting.