Enhancing Realism In Orchestral Samples Part 3 – Percussion Part 1 and part 2 of this three part series dealt with the melodic instruments of the orchestra of strings, winds and brass and here we are in the final part of the series talking about percussion. Percussion instruments are all…

How To Make Your Percussion Sound Big
Aaaaah the elusive ways of massive hard-hitting cinematic percussion…
We’ve all been there when we were starting out our careers as young composers. One of the most important aspects of making a good action or epic cue is making your percussion sound massive and big, but with good definition to make them cut through the orchestra without sounding muddy and cluttering your mix. There are a few things we will cover in the following sections.
LAYERING:
What I mean by layering is basically your composition workflow.
Try to divide your percussion into sub-low-mid-high layers, or basically frequencies.
This will help a lot in making a good arrangement and defining which instruments will cover which frequencies and which instruments will be the rhythm carriers.
I can give you some “logical” tips here, but it all depends on the results you want to achieve.
Subs and lows should be used only for accenting the beats. You don’t want sub booms or low-end taikos playing your 8th or 16th notes. They will just make a mess.
Those types of drums and impacts are used for making your first hit on the beat more present so you get a sense of where the rhythmical sequence starts.
Mids are the ones carrying your groove and they are the ones playing the 16th notes that are fast and this is how you get a sense of movement. Pay close attention to those dynamics and take care of your velocity data so you don’t get a machine gun effect, and you’ll be fine. Most of today’s popular percussion libraries come with round robins, so you’ll be triggering various layers of samples for a natural sound.
Highs are good for making the percussion cut through the mix by accentuating lows and making the mids more present. For example, you could use a Piatti crash or anvil hit to make the lows more noticed when starting a new bar and use some shakers or sticks to give more presence to the mids that are carrying your groove.
REVERB:
Let’s get one important thing straight: you DON’T need a big reverb to make your drums sound massive, quite the opposite. The most common mistake that young composers out there (who are just starting out) make is to open the floodgates of reverb on basically everything and think they’ll achieve a big sound. That’s a big NO-NO!
What you can do is to pick a short reverb with a short pre-delay and short tail, just to colour the sound of your percussion a little so they have a bit of space. A good plate reverb is my tool of choice, but you can use anything you like, as long as you keep it short. It’s amazing how much you can get with just a bit of reverb.
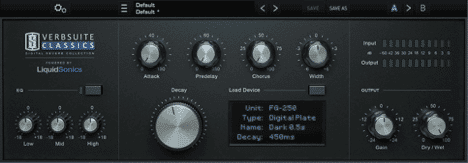
There’s one question that keeps coming up from time to time, and that is, should you EQ your reverb?
HELL YES!
Reverb definition is also very important, especially if you are using a few of them in a mix, so you need to position them properly in the mix. Reverbs are known for boosting frequencies just like that, so you can quickly get a muddy mix which sounds really cluttered.
So defining the frequency range of your reverb is very important. I personally like to cut my reverbs below 120Hz and above 6.5kHz so I get a nice warm sound.
Tweaking the mids depends on how much material you are sending to the reverb, so you should pay attention to listening to the low mids in general because they are responsible for making your mix muddy.
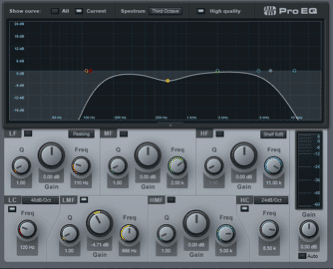
Try and experiment and see what works best for you. Bear in mind that your percussion is part of a larger mix, so you need to leave some room for other elements in the orchestra.
Presets? Well, there are a lot of good presets out there, but the best results you will get is by making your own setup. Or take a preset and tweak it until you get the results you like and save it as your own. I was personally never fond of using factory presets.
There are great algorithmic plate and hall reverbs out there by UAD, Waves, TC Electronic, Slate Digital and Valhalla. Convolution stuff by Altiverb works great too. Just make sure you are keeping that tail short so it doesn’t water down your rhythmic parts.
EQ & COMPRESSION:
You’ve done half the job of EQing by properly layering your percussion, so all you can do now is to do some frequency control by cutting unwanted things out of the instruments, so you don’t get a big frequency build-up.
A good way to start:
Leave the subs only in between 20Hz-60Hz.
Cut the lows below 60Hz.
Cut the mids below 150Hz.
Cut highs below their frequency range, usually below 1K, depending on the material because some Piatti and cymbals can play frequencies at 500Hz, or 800Hz, anvils too.
Now you’ve got yourself a good starting clean percussion, if you feel that some frequencies are still building up, get that EQ and cut some tummy away in the frequencies that are bothering you. As I said, it’s usually in the low-mids area.
Use whatever parametric EQ you have, as long as it has a frequency display, so you can see and hear what you’re processing. FabFilter ProQ2 for example, or if you’re using any Major DAW out there, their bundled EQs also do the trick.
Regarding the compression and sound colouration, my two tools of choice are your standard software compressor which comes with the DAW you are using, and a transient designer. You can also use a 3rd party software compressor from the likes of FabFilter C2, Oxford Dynamics or Waves C1.
What you need to know is that your percussion materials need to have that initial smack on every hit, so you don’t want to compress them straight away. Use longer attack time on the compressor.
You should also balance your threshold so the compressor only lightly touches your percussion. You don’t need them to get stomped on, just a light touch in order to make them move better.
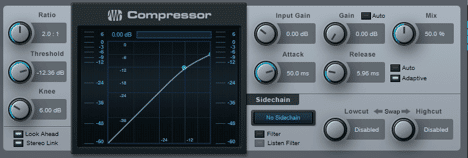
Release time should also be a bit shorter on the mid-range drums, and a bit longer on the lower stuff. The ratio should usually be around 1:5:1 to 2:1, because you don’t need to hear the compression, just feel it.
The best thing you can do if you have a compressor with the mix option is to make the mix 50% wet and 50% dry. That is known as parallel compression, so you will get a great balance between the compressed signal and the original one you provided.
If you don’t have a compressor like that, you can always create an FX bus with a compressor on, and then send the signals in it as you would into a reverb, so you have control of how much compression you want.
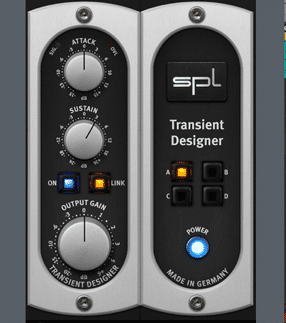
Transient Designer is a good way of making that initial smack more present and heard and makes your percussion really pop out. I like to use them mostly on mid and low drums. Fast attack time and just a tiny bit of sustain on the lows, and you’re all set.
And that about covers it all! Have fun, experiment and happy mixing!

